What You Need
- Flat-bottomed guttering (usually comes in 3–4m lengths — may need cutting to manageable lengths)
- End fittings — one sealing end and one push-fit (for drainage) end for each gutter
- Supporting structure (e.g. table, shelves) or frame (must hold gutters at an angle)
- Drainage tray (optional)
- Compost or growing substrate — you can use ordinary soil
- Seeds or seedlings for your GutterGrow
Step 1 — Get Hold of Some Gutters
Gutters are fundamental to GutterGrowing systems. You may have some spare ones lying around or you may want to buy new or second hand. Plastic gutters are now the standard found in many DIY and builders merchants and come in many different colours, lengths and profiles.
Some Considerations
Black gutters tend to absorb heat (useful in aiding germination — but need water more often) whereas lighter coloured gutters tend to be cooler (requiring less irrigation). Flat-bottomed gutters are the most versatile (as they don't roll over) but it's easier to slide plants out of round-bottom gutters.
DIY stores will often cut gutters to the length you require. We have found that gutters cut to between 1 and 1.5 metres are quite manageable. Metal gutters are heavier, expensive and more difficult to handle.
Step 2 — Fit End Fittings
The best solution is to have one end of the gutter higher than the other so that irrigation fluid will run from the higher end to the lower end. The higher end can be fitted with a sealed end fitting (where irrigation can be introduced) and the lower end fitted with a push-fit fitting that contains the compost but also allows surplus water to drain out.
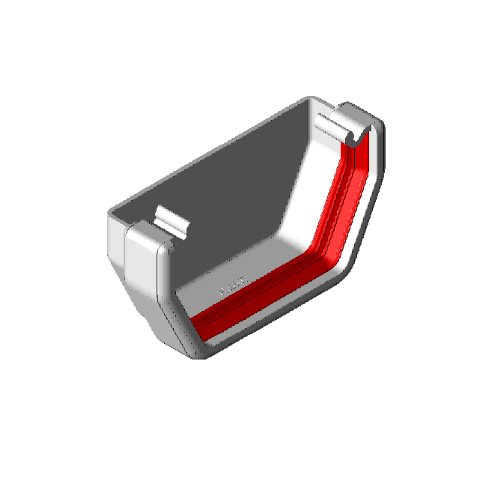
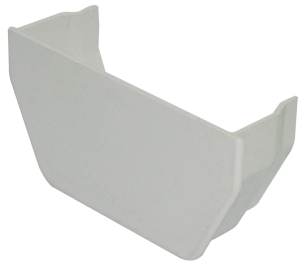
Step 3 — Choose a Supporting Structure
The supporting structure needs to be strong enough to support the weight of the gutters when filled with irrigated compost and also to hold them at an angle to facilitate drainage. You can easily adapt shelving units, tables, walls or many types of frame. Gutters should protrude over the end of the supporting structure so that they can drain into an optional drainage tray.
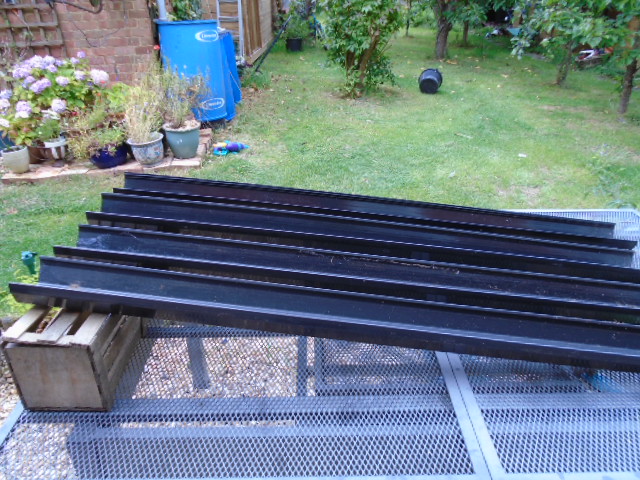
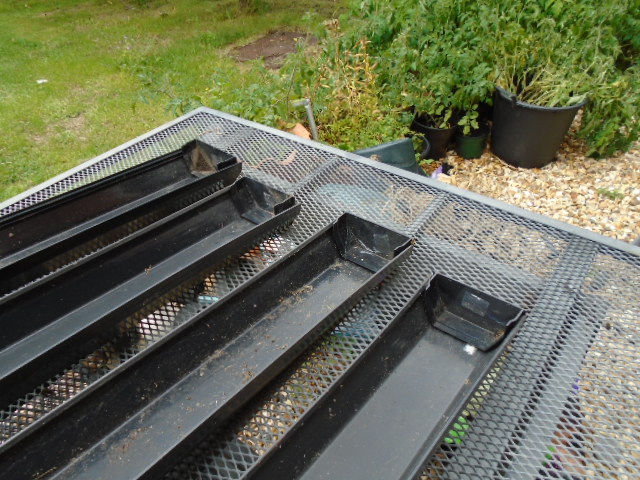
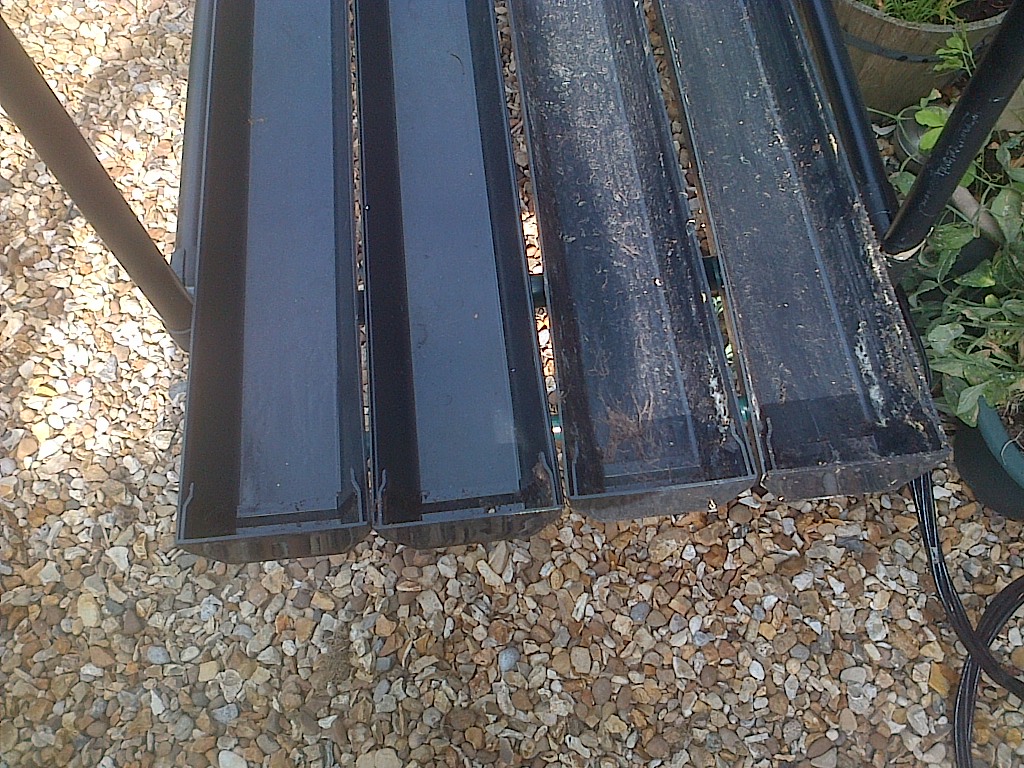
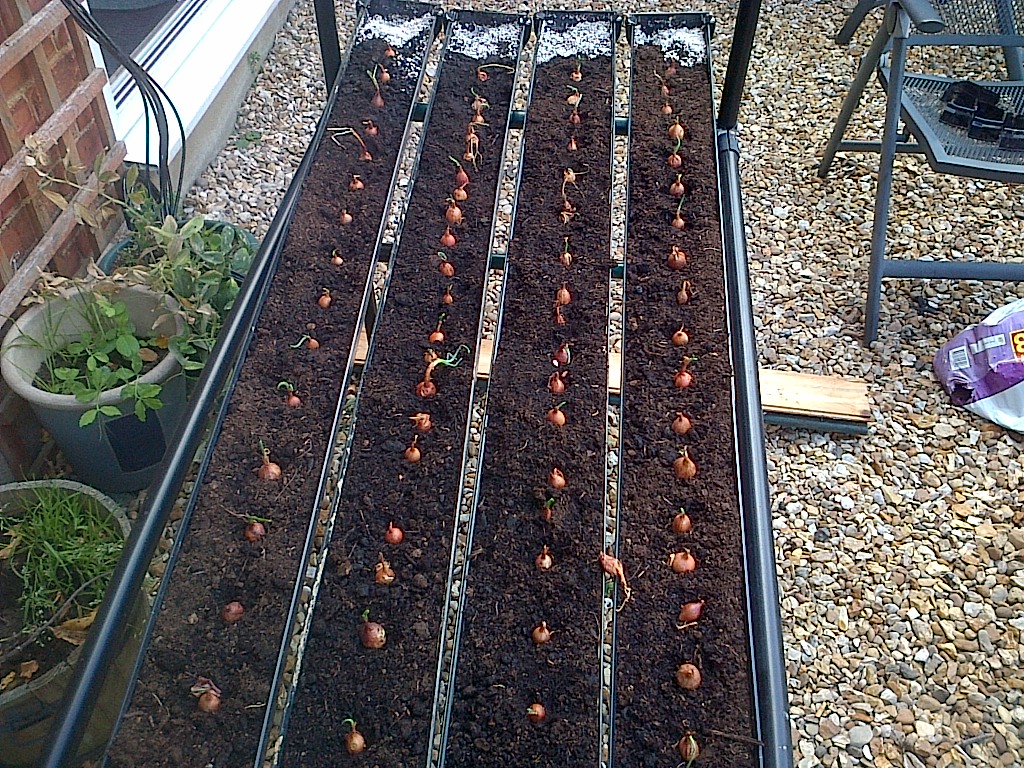
The pictures above show black gutters on a table with a box to keep them at an angle — the lower end has push-fit fittings (for drainage) and the upper end has the sealed end fitting.
Step 4 — Fill with Compost
The easiest and most versatile solution is to fill the gutters with fresh clean compost suitable for growing a wide range of plants and vegetables. Compost has the advantage of usually being free of insects and other pests, and many composts have added plant nutrients.
Congratulations — You're Ready to Grow!
Operating a Basic System
Operating a basic GutterGrowing system is much the same as growing plants in pots. Seeds need to be planted and fed and watered in accordance with instructions on the seed packet. Plant food can be placed at the upper sealed end of the gutter and then when irrigation water is introduced it will carry the plant food down the length of the sloping gutter. You can catch any excess in a drip tray and re-use it.
If you want to make life easier then the next project will automate your GutterGrow irrigation system with a timer — leaving you free to take a well-deserved holiday!